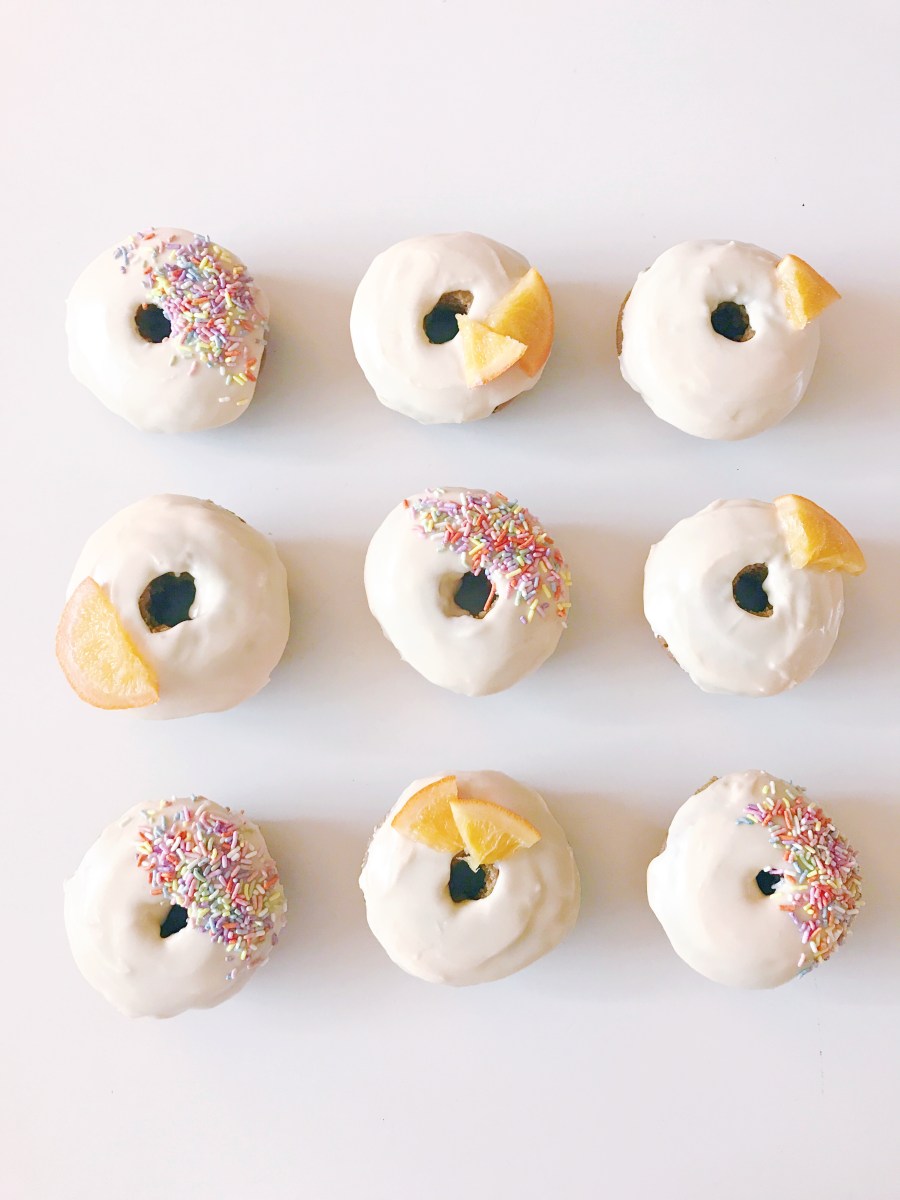
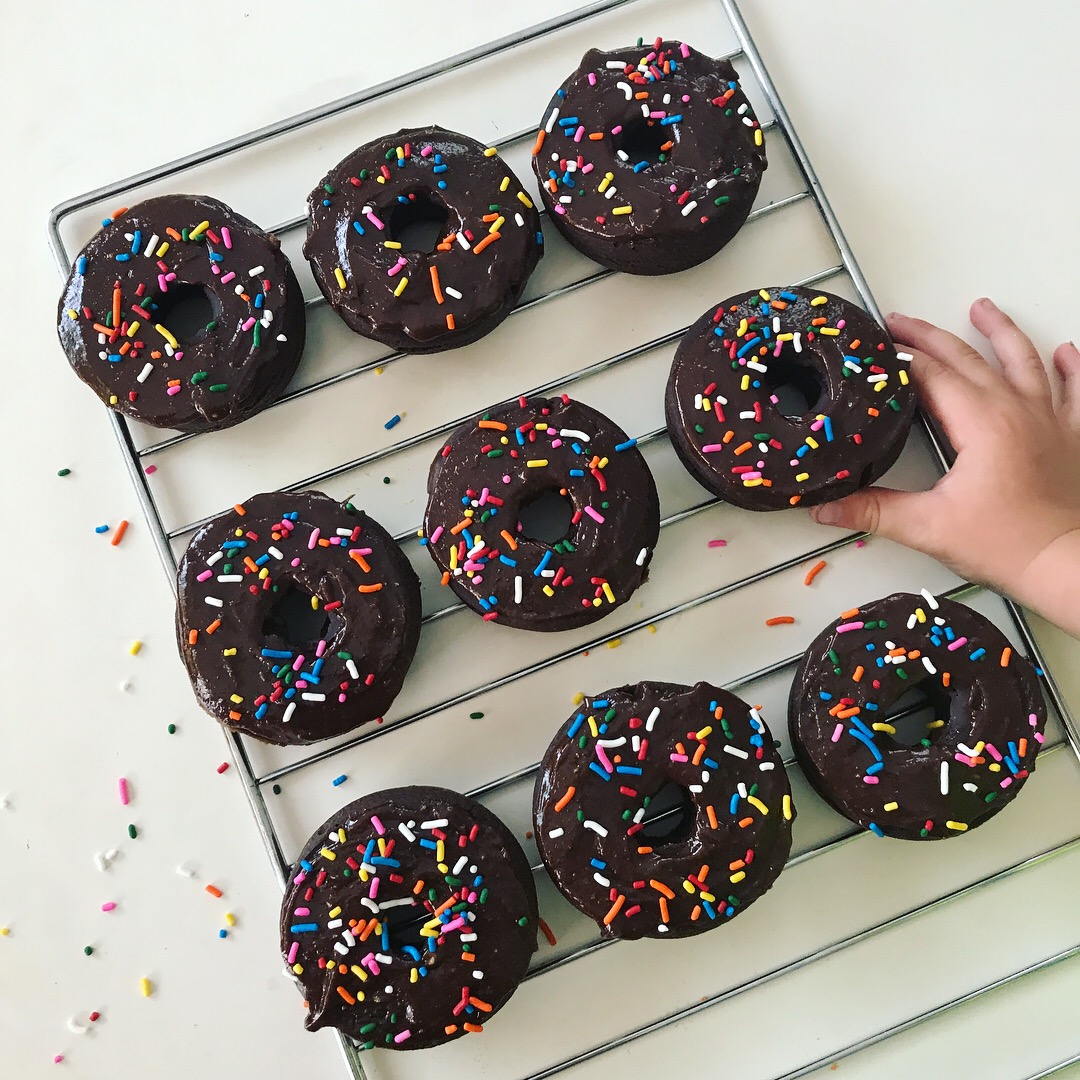
When it comes to donuts, we all know how much i love to bake them. I’m constantly trying to make the best batch better than the last, and these were no exception.

These were definitely an experiment, and i had no idea how they’d come out, but HOLY MOLY THEY ARE SO GOOD.

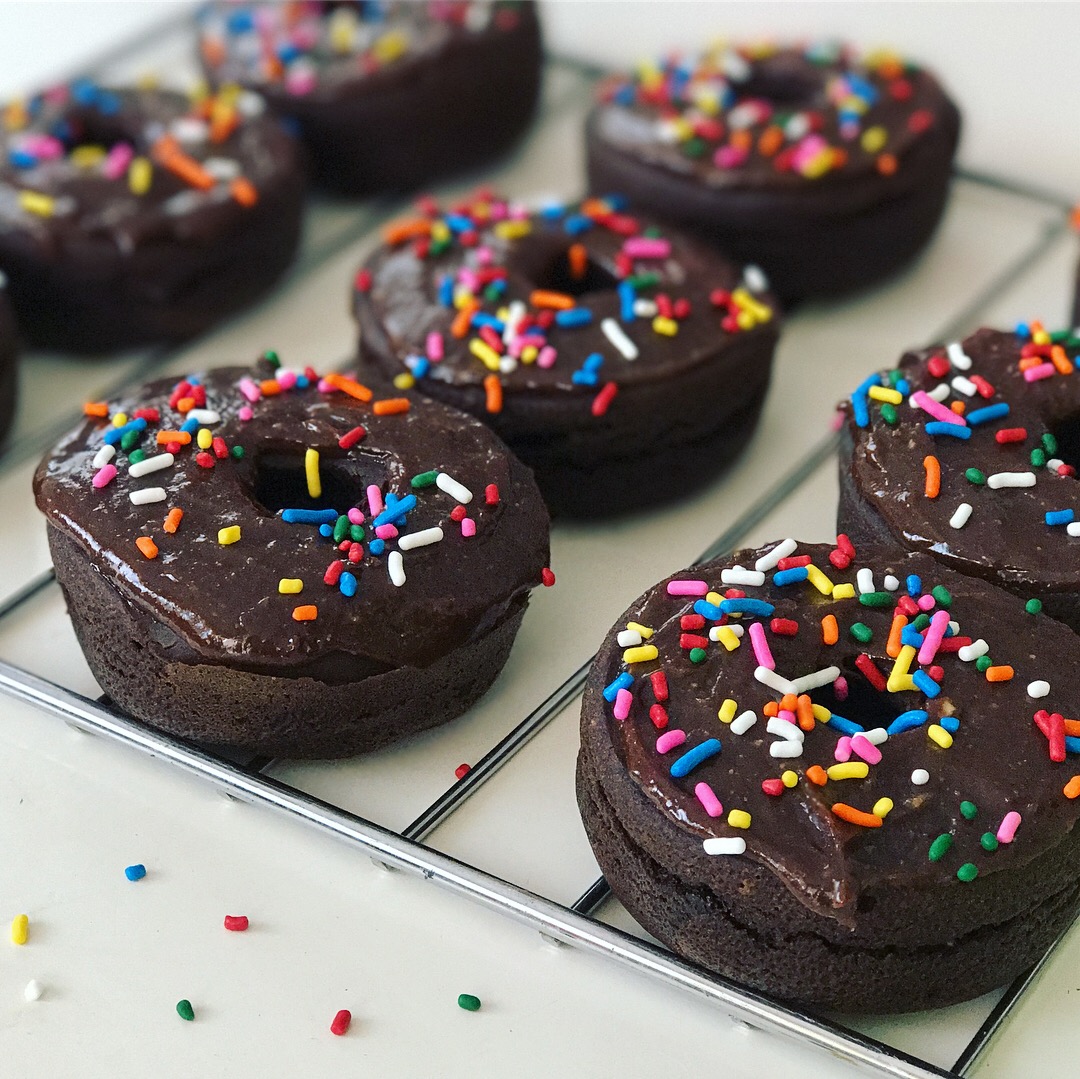
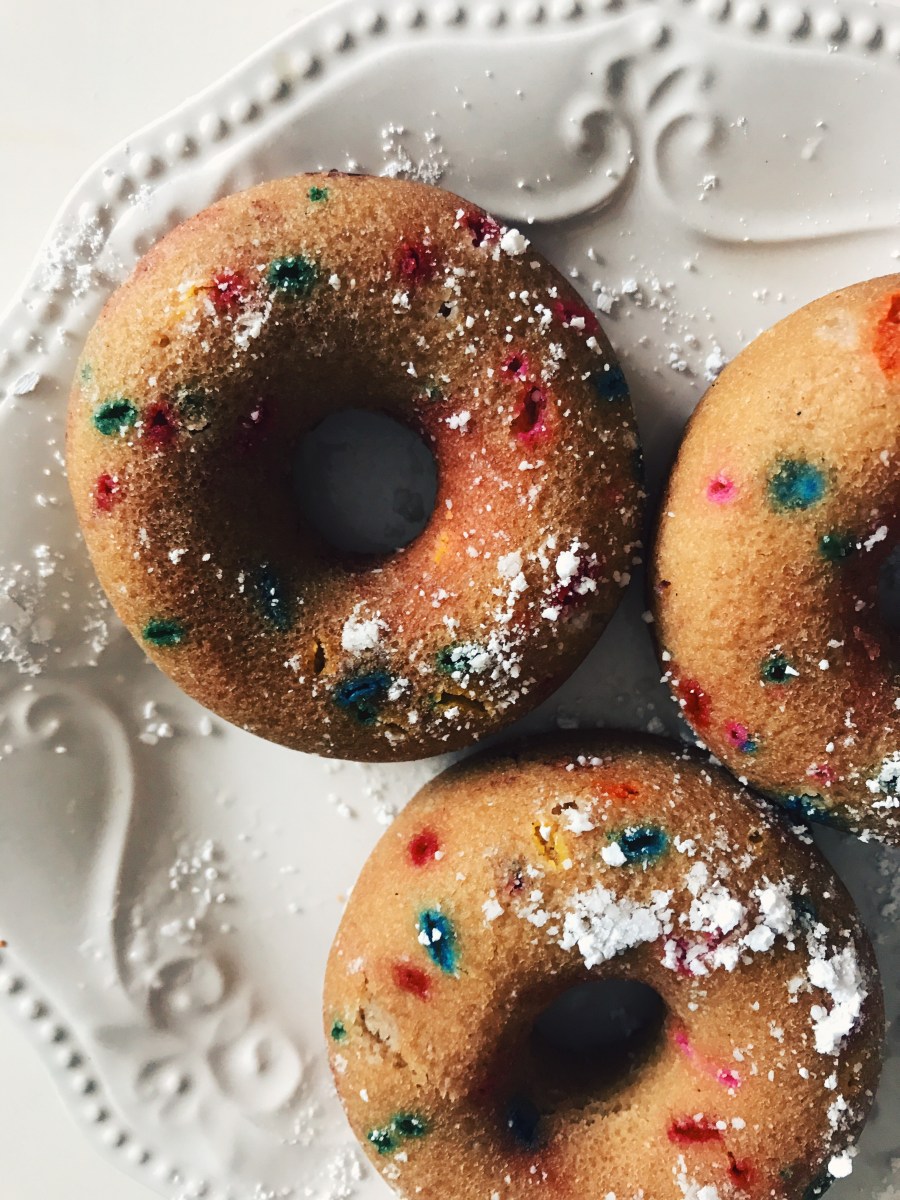
Winter is citrus season, and we just had our local mandarin festival last weekend. So i was inspired by all the orange and mandarin trees everywhere up here in Northern California for these orange + vanilla creamsicle donuts…and i made two recipe variations; one vegan and gluten free and one healthy(ish) version…

Orange Vanilla Creamsicle Donuts 🍩🍊

Donut Ingredients:

  • 1 cup organic whole wheat flour
  • 1 1/2 Bobs Red Mill 1:1 gluten free baking flour
  • 3 organic and free range eggs
  • 2 tablespoons Chosen Foods avocado + coconut oil blend
  • Zest of three organic oranges
  • 1 cup organic orange juice
  • 2 teaspoons organic vanilla extract
  • 1 cup organic coconut sugar
  • 1/2 cup organic sugar (optional) or just add more coconut sugar, 100% pure maple syrup, or honey
  • 1 teaspoon organic vinegar
  • 1/4 teaspoon organic salt
  • 1 tablespoon organic no hormone ghee, softened to room temp
  • 1/4 cup organic unsweetened almond, cashew, or coconut milk
  • 2 tablespoons baking powder
  • 1 tablespoon baking soda
  • Sprayable coconut oil

Frosting Ingredients:

  • 4 cups powdered sugar
  • 1 tablespoon organic vanilla
  • Juice from one organic orange
  • Optional: 4 drops artificial coloring free red + yellow food dyes
  • Optional: 1/2 teaspoon orange zest

Candied Orange Ingredients:

  • 1 organic orange
  • 1/2 teaspoon organic vanilla
  • 1 cup organic granulated sugar
  • 2 tablespoons raw, local honey
  • 2 tablespoons 100% pure maple syrup

Orange Vanilla Creamsicle Donut Directions:

  1. Make candied oranges first (see below for Directions)
  2. Preheat oven to 350 degrees F
  3. Add all dry ingredients into a large mixing bowl and mix together
  4. In another large mixing bowl, add all wet ingredients, including eggs and ghee and mix until smooth
  5. Add wet and dry ingredients together and blend until batter-like consistency forms
  6. Spray donut pan with coconut oil
  7. Distribute batter into donut pans. Add about halfway up the donut mold (it’s less than you’d think, as they puff up really tall!)
  8. Bake at 350 for 20-25 minutes depending on your oven
  9. When a toothpick comes out clean, remove from oven and let cool
  10. Remove donuts from mold and let cool on baking racks for 30 minutes
  11. Make frosting (Directions below) while you wait for donuts to cool
  12. Optional: add artificial coloring-free and dye-free sprinkles
  13. Frost donuts with glaze and decorate with sprinkles and candied oranges!

Frosting Directions:

  1. Add powdered sugar to a large mixing bowl
  2. Add freshly squeezed orange juice
  3. Add vanilla
  4. Mix until thick. If frosting is too runny, add more OJ. If too thin, add more powdered sugar.

Candied Orange Slices’ Directions:

  • Slice one organic orange into slices
  • In a large saucepan, add 3 cups water, 2 tablespoons of local, raw honey, 2 tablespoons of organic maple syrup, and 1 cup of organic sugar
  • Add water + sugar + honey + syrup to large saucepan and turn burner on high
  • Mix everything together until sugar is melted
  • Once boiling, add orange slices
  • Reduce heat and simmer on low for 35 minutes
  • Remove oranges by pouring them careful into a strainer
  • Place on parchment paper and let dry for about 30 minutes or so

Vegan and Gluten Free Orange Vanilla Creamsicle Donuts 🍩🍊

Ingredients:

  • 2 1/2 cups Bobs Red Mill 1:1 gluten free baking flour
  • 3 flax eggs or 3/4 cup organic applesauce
  • 2 tablespoons Chosen Foods avocado + coconut oil blend
  • Zest of three organic oranges
  • 1 cup organic orange juice
  • 2 teaspoons organic vanilla extract
  • 1 cup organic coconut sugar
  • 1/2 cup organic sugar (optional) or just add more coconut sugar, 100% pure maple syrup, or honey
  • 1 teaspoon organic vinegar
  • 1/4 teaspoon organic salt
  • 1 tablespoon organic vegan/dairy-free butter (or just add 1 extra table spoon of oil)
  • 4 cup organic unsweetened almond, cashew, or coconut milk
  • 2 tablespoons baking powder
  • 1 tablespoon baking soda

Frosting Ingredients:

  • 4 cups powdered sugar
  • 1 tablespoon organic vanilla
  • Juice from one organic orange
  • Optional: 4 drops artificial coloring free red + yellow food dyes
  • Optional: 1/2 teaspoon organic orange zest (about 1/2 orange)

Candied Orange Ingredients:

  • 1 organic orange
  • 1/2 teaspoon organic vanilla
  • 1 1/2 cups organic granulated sugar
  • 2 tablespoons 100% pure maple syrup

Donut Directions:

  1. Make candied oranges first (see below for Directions)
  2. Preheat oven to 350 degrees F
  3. Add all dry ingredients into a large mixing bowl and mix together
  4. In another large mixing bowl, add all wet ingredients, including applesauce and vegan butter and mix until smooth
  5. Add wet and dry ingredients together and blend until batter-like consistency forms
  6. Spray donut pan with coconut oil
  7. Distribute batter into donut pans. Add about halfway up the donut mold (it’s less than you’d think, as they puff up really tall!)
  8. Bake at 350 for 20-25 minutes depending on your oven
  9. When a toothpick comes out clean, remove from oven and let cool
  10. Remove donuts from mold and let cool on baking racks for 30 minutes
  11. Make frosting (Directions below) while you wait for donuts to cool
  12. Optional: add artificial coloring-free and dye-free sprinkles
  13. Frost donuts with glaze and decorate with sprinkles and candied oranges!

Candied Orange Slices’ Directions:

  • Slice one organic orange into slices
  • In a large saucepan, add 3 cups water, 2 tablespoons of organic maple syrup, and 1 1/2 cups of organic sugar
  • Add water + sugar + honey + syrup to large saucepan and turn burner on high
  • Mix everything together until sugar is melted
  • Once boiling, add orange slices
  • Reduce heat and simmer on low for 35 minutes
  • Remove oranges by pouring them careful into a strainer
  • Place on parchment paper and let dry for about 30 minutes or so

When it comes to veggies, I’ve been having a hard time digesting them, which I️ loathe because I️ actually really love vegetables of all kinds. Thanks, once again, endometriosis; it’s so kind of you to disrupt my GI tract. But, despite l endo pain, I’ve still been forcing myself to eat a variety as much as I️ can tolerate, because duh, we have to eat to survive.

Today, i figured sweet potatoes would be a good way to sneak in vitamins and minerals, and hoped they’d be somewhat mellow to digest. Sweet potatoes are that one veggie i can never decide if i actually like or not, so today i changed it up with my seasoning on them, and they were SO GOOD. I also find that i prefer yams > sweet potatoes, so i wanted to research the difference – besides just the color – (and share this yummy roasted sweet potato + yam recipe with you). So, if you don’t care about the geeky nutritional info, skip below to the recipe.

If you’re still reading, here’s the low-down on yams vs. sweet potatoes via Library of Congress (https://www.loc.gov/rr/scitech/mysteries/sweetpotato.html)

Although yams and sweet potatoes are both angiosperms (flowering plants), they are not related botanically. Yams are a monocot (a plant having one embryonic seed leaf) and from the Dioscoreaceae or Yam family. Sweet Potatoes, often called ‘yams’, are a dicot (a plant having two embryonic seed leaves) and are from the Convolvulacea or morning glory family” (Library of Congress, 2017).

Yams

Yams are closely related to lilies and grasses. Native to Africa and Asia, yams vary in size from that of a small potato to a record 130 pounds (as of 1999). There are over 600 varieties of yams and 95% of these crops are grown in Africa. Compared to sweet potatoes, yams are starchier and drier (Library of Congress, 2017).

Sweet Potatoes

The many varieties of sweet potatoes (Ipomoea batatas) are members of the morning glory family, Convolvulacea. The skin color can range from white to yellow, red, purple or brown. The flesh also ranges in color from white to yellow, orange, or orange-red. Sweet potato varieties are classified as either ‘firm’ or ‘soft’. When cooked, those in the ‘firm’ category remain firm, while ‘soft’ varieties become soft and moist. It is the ‘soft’ varieties that are often labeled as yams in the United States (Library of Congress, 2017).

Why the confusion?

In the United States, firm varieties of sweet potatoes were produced before soft varieties. When soft varieties were first grown commercially, there was a need to differentiate between the two. African slaves had already been calling the ‘soft’ sweet potatoes ‘yams’ because they resembled the yams in Africa. Thus, ‘soft’ sweet potatoes were referred to as ‘yams’ to distinguish them from the ‘firm’ varieties (Library of Congress, 2017).

<
ay, the U.S. Department of Agriculture requires labels with the term ‘yam’ to be accompanied by the term ‘sweet potato.’ Unless you specifically search for yams, which are usually found in an international market, you are probably eating sweet potatoes (Library of Congress, 2017).

<
interesting…

Anyway, regardless if you like one of the other, here’s the Roasted Sweet Potato and Yam Recipe:

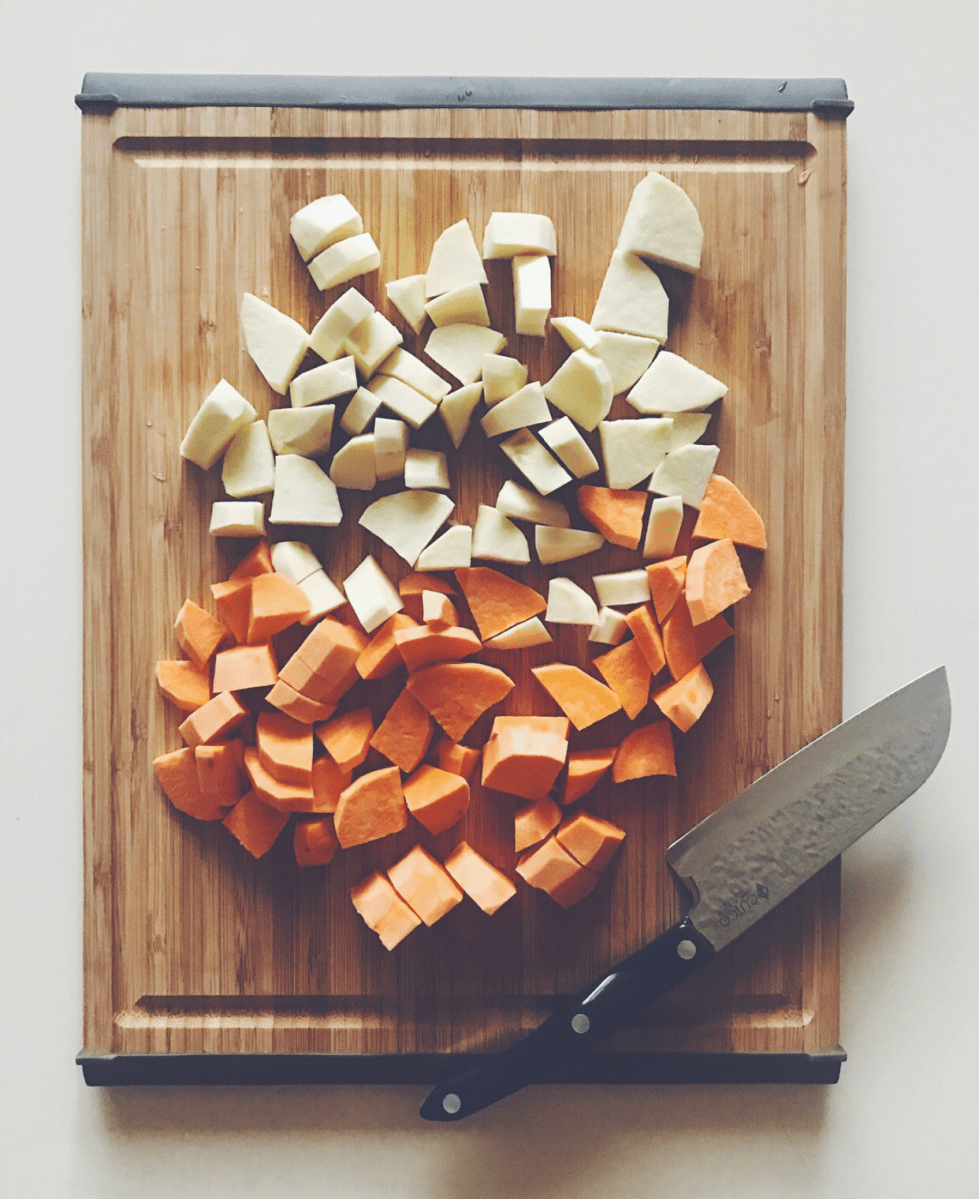
Ingredients:* If meal prepping these to use all week, consider doubling the recipe 1-2 large organic yam(s), peeled and cubed

  • 1-2 large organic sweet potato(es), peeled and cubed
  • Ground Paprika
  • Ground Garlic Salt
  • Ground Cinnamon
  • Ground Turmeric
  • Ground Ginger
  • Ground Black Pepper
  • Avocado Oil, 2-4 tablespoons

Directions:Preheat oven to 400 degrees F

  1. Line a large baking sheet (that has edges) with non-stick foil
  2. In a medium sized bowl (or right on the sheet) add sweet potatoes and yams in one layer so none are overlapping
  3. Add oil and seasonings. There are no “official” measurements for the seasonings. Just lightly sprinkle a thin layer atop the potatoes and mix together
  4. Lay potatoes back down on the sheet to one even row where none are on top of another
  5. Bake @400F for 30 minutes, flipping potatoes halfway through
  6. Remove, let cool, and serve as a side, in a Buddha Bowl like this (arugula, over-hard fried egg, yams and sweet potatoes, avocado, and pork) or in a soup like my Savory Fall Soup.
  7. Enjoy!

When fall is in the air, all I want to eat is soup. I get cold so easily, so nothing warms the belly (or the soul) more than homemade soup – especially when it’s a warm, hearty puree.

This is one of my favorite (and new!) fall recipes now that I live in Northern California, so from my kitchen to yours, I hope you enjoy it as much as I do!

Ingredients:

IMG_9052

  • 1 1/4 – 1  1/2 cup vegetable stock if vegan (or chicken stock OR organic chicken bone broth if not)
  • 1 stick-pack of Vital Protein’s Organic, Free Range, Chicken Bone Broth Collagen (leave OUT if vegan)
  • 1 pound organic cubed butternut squash (I buy mine pre-cubed, because #momlife and no time to prep a whole squash). Can also use pumpkin, or a combo of both
  • 1 can of organic pumpkin puree
  • 1 organic Granny Smith apple cored, and cubed
  • 1 medium organic onion, sliced
  • 1 tablespoon avocado oil (I like Chosen Foods)
  • 1-2 clove(s) of organic garlic, minced
  • Pink Himalayan salt + ground black pepper to taste
  • 1/8 teaspoon ground cayenne powder (or more depending on your spice-level) to taste
  • freshly ground black pepper to taste
  • Optional: unsweetened coconut, cashew, or almond milk as a thinning agent
  • Optional: garlic + onion powder to taste
  • Optional: Pinch of dried sage, thyme, or oregano
  • Want to garnish your soup? Try topping with pumpkin seeds, fresh chives, fresh parsley, pomegranate, or baked apples

Directions:

  1. Preheat your oven to 400 degrees F
  2. Grab a large baking sheet and line with parchment paper (make sure to check what the max heat tolerance is)
  3. In a large mixing bowl, add your cubed butternut squash + sliced onion
  4. Add avocado oil to bowl and top with salt and pepper
  1. Bake for about 20 minutes
  2. Remove baking sheet from over and add the garlic and apple to the pan with the squash + onion
  3. Bake for another 30 minutes or so, or until apples + squash are tender and soft, being careful to not let garlic burn
  4. Remove baking pan and set aside to cool
  5. Optional: warm broth in a stove-top pan and add Vital Protein’s Bone Broth or Collagen
  6. Now, you can chose to use either a hand-immersion blender or a high-speed blender
  7. Transfer your baked goodies to large pot (if using hand-immersion blender) or to your high-speed blender
  8. Add cayenne + veggie/chicken stock/broth + bone broth collagen + any other spices you wish
  9. BE SURE TO LET ALL CONTENTS COOL OR BE VERYYYYY CAREFUL ADDING HOT INGREDIENTS TO A BLENDER.
  10. Blend on high for 2-3 minutes, or until soup is silky smooth
  11. If consistency is too thick, add more of vegetable stock and/or dairy-free milk (I typically add another cup of veggie stock/broth!)
  12. Taste and add more seasoning if necessary
  13. If you want to serve immediately, if soup cooled down to much, heat in a large pan on the stove
  14. When ready to serve, ladle soup into bowls and serve
  15. For leftovers: refrigerate up to 3 days or freeze up to one month in an air-tight container

This week, I’m throwing it back to some of my favorite fun and festive recipes from an #upandautumn challenge I hosted two years ago. Thank you to Timehop for reminding me how cute and yummy this Frankenstein smoothie is! Your little(s) will love it too!

Frankenstein’s Green with Envy Mint Chocolate Chip Shake

INGREDIENTS:

  • 1 large handful fresh, organic spinach
  • 3-4 drops mint peppermint extract
  • 1/4 cup soaked (overnight) cashews, drained
  • 1-2 cups organic + unsweetened coconut, almond, or cashew milk
  • 1/2 frozen banana and/or 1/4 avocado
  • 1-2 tablespoons raw cacao nibs or Enjoy Life dark chocolate chips
  • 1 tablespoon unsweetened cacao powder
  • 1/2 teaspoon vanilla extract
  • Optional: 1/2 teaspoon maple syrup or raw, local honey
  • 3-4 ice cubes
  • Optional dairy: add 1/4 cup coconut, Greek, or whole yogurt
  • Optional extra protein: add scoop of your preferred vegan protein powder (may need to add 1/4 cup water)

Directions: 

Add all ingredients in a blender, blend,

serve and enjoy!

Tip: turn into a milkshake!!! After blending all

ingredients, let sit in the freezer for about 1 hour for

a frosty mint shake! You can also pour “batter” into

ice cubes until all the way frozen, then add more

coconut milk and re-blend, or add all blended

ingredients into an ice-cream maker.

When it comes to motherhood, it can be hard for us mamas to take care of ourselves before anyone else, especially our children. It’s important for us to remember that we need to treat our bodies and our minds just as well as we treat our family’s. I take care of me for my son, and I start within.

SimplyBiotix is running a “Taking Care of Us” campaign, and I couldn’t relate to it more. Probiotics are one of my favorite things when it comes to gut health. I’ve recently been diagnosed with endometriosis, and for the last year have suffered from ruptured ovarian cysts. The cysts, which were once “functional cysts” have now begun to form as “complex,” which basically means instead of being filled with fluid, they are filled with a mass or blood…scary. I’ve seen countless doctors, both eastern and western medicine, and one thing that have ALL said the same….overall health starts with good gut health. And you know what each one has recommended? A probiotic.

“Probiotics are live bacteria and yeasts that are good for your health, especially your digestive system. We usually think of bacteria as something that causes diseases. But your body is full of bacteria, both good and bad. Probiotics are often called ‘good’ or ‘helpful’ bacteria because they help keep your gut healthy” (webMD, 2017). 


The past few years have definitely been filled with change, stress, emotions, ups, downs, and basically everything in between. I’ve learned just how mandatory it is for my body AND my soul that I start taking care of better care of myself. As a single mom, I don’t have much “free time;” I mean, who does?! But, if there’s one easy way I can start to take care of my gut (with the benefits of other perks, too), it’s happily adding a probiotic into my daily routine.

Thanks to SimplyBiotix, you can read more about probiotics and learn more about their benefits here. Below is an outline of 10 good reasons to take probiotics via Simply Biotix:


IMG_7963.JPG

10 Benefits of Probiotics

1. Digestive Issues/IBS

Probiotics are known for treating all kinds of digestive issues including diarrhea and excessive gas and bloating. Probiotics fix the balance of gut bacteria you need for more functional digestion. No one has time for diarrhea or abdominal pain.

2. Immunity & Colds/Flu

Supporting the beneficial bacteria in our guts is crucial for immune function. Beneficial bacteria minimize toxic byproducts of bad bacteria in our bowels, which in turn help to block pathogens and other toxins from being reabsorbed into our bodies…and making us very, very sick!

3. Weight Loss

The bacteria in our guts influence how we break down foods and absorb nutrients, so a healthy gut means a healthier metabolism. In addition, gut bacteria can influence our food cravings, making us want ice cream over some healthy fruit.

4. Oral Health

Our intestines aren’t the only place that bacteria populate, they’re in our mouths too. Probiotics can reduce oral diseases, throat infections, tooth decay, AND bad breath. If mints aren’t doing the trick, try a probiotic lozenge or gum!

5. Mood

Why do we think certain moods cause “butterflies” in our stomachs? The connection between our brains and our guts is evident. If our gut bacteria aren’t balanced, our brains won’t be either. Probiotics can aid in treating depression, anxiety, anger, and even ADHD.

6. Brain Function

We find ourselves having trouble with focus and concentration on our day-to-day tasks. Well, our gastrointestinal tract is linked to our brain by the vagus nerve, so for our brains to work properly, so must our digestive systems. A healthy digestive system provides us with the nutrients needed for healthy brain function.

7. Healthy Skin

When our digestive systems aren’t working very efficiently, wastes can be expelled in other ways, such as through our skin. Probiotics can help eliminate that problem so these toxins are removed through our gastrointestinal tracts rather than through our pores, causing acne and other skin issues.

8. Allergies

When our immune system overreacts to an allergen, we suffer from allergies. Both allergies and the immune system have been connected to digestive issues and unbalanced gut bacteria. Probiotics may help reduce allergy symptoms. A benefit of probiotics seen in infants is improved eczema symptoms when mothers take probiotics during pregnancy.

9. Heart Health

Probiotic bacteria produce vitamins that your heart needs to stay strong and healthy as well as keep our arteries clear. After we eat food, the bacteria living in our gut produces chemicals that are absorbed into our blood stream. These chemicals support the health of our blood vessels and heart.

10. Urinary and Vaginal Health

Beneficial bacteria also reside in the urinary tract and vagina. Without them, excessive pathogenic bacteria and yeast will grow, causing all kinds of uncomfortable issues we just do NOT want to deal with. Taking probiotics can keep the pH balance of the urinary tract and vagina slightly acidic so we don’t have to worry about that.

IMG_7962.JPG

SimplyBiotix is a probiotic line offering the following products:

  • Gutsy
    • Kid-friendly
    • Berry burst flavor
    • Fast melting probiotic powder; no need for water (you take it like a pixie stick – but we cannot say pixie stick)
    • Easy, on-the-go way to get your daily dose of probiotics
    • Supports digestive health and immune health
  • Oral & Sinus
    • Cinnamon flavored lozenge
    • Helps with bad breath
    • Supports ear, nose and throat health, oral health and immune health
    • Many people aren’t aware that probiotics aren’t just for your gut – probiotics live in your mouth too. We also need to promote good bacteria to balance out the bad bacteria, which will result in fresh breath
    • Sugar-free and kid-friendly
  • Gut Health
    • Supports digestive health and immune health
    • This supplement was developed with BIO-Tract Technology. This innovative delivery system protects the 2 billion live cultures of 7 beneficial probiotic strains in Gut Health to ensure these “good” bacteria survive so they arrive in your gut alive.
      • Customers need to be aware of the products they buy – some probiotic products don’t guarantee survival of good bacteria by the time they arrive in your gut and thus is no longer beneficial for them to take!
  • Max Strength
    • Supports digestive health, immune health and women’s vaginal & urinary health
    • Probiotic for those who need extra support
    • This supplement was developed with BIO-Tract Technology
      • Protects the live bacteria from “lava-like” gastric acid in the stomach while also ensuring the live bacteria are evenly distributed to help replenish the health bacteria in your entire digestive tract.


IMG_7961.JPG

How do YOU take care of YOU so you can take care of your family?


This blog post was sponsored, but all opinions are my own. 

This is a sponsored conversation written by me on behalf of Simply Biotix. The opinions and text are all mine.


SaveSave

SaveSaveSaveSave

SaveSave

This is a sponsored conversation written by me on behalf of Simply Biotix. The opinions and text are all mine.

https://influencers.tapinfluence.com/assets/cogs/core-v4.js var ts=document.getElementById(‘ti-pixel-tracker’); var axel = Math.random() + “”; var num = axel * 1000000000000000000; var ti=document.createElement(“img”); ti.style.display=”none”; ti.src=”https://tracking.tapinfluence.com/trk/NCjGN/StqkE/p.png?p=Jr8bf&#8221; + String.fromCharCode(38) + “i=gJ9Ex” + String.fromCharCode(38) + “ord=”+ num + String.fromCharCode(38) + “s=” + encodeURIComponent(document.referrer); ts.parentNode.replaceChild(ti,ts); JSON.stringify({“program_id”:”7f1af754-8ccc-11e7-9974-22000a66c666″,”post_id”:”3a3db248-8cd1-11e7-a3a5-22000a7d00a4″});

It’s been just about a year since I’ve been a medical guinea pig. I’ve seen specialist after specialist and have had just about every test run to try and figure out why I was having (and am still having) such horrible, chronic right-sided pelvic pain. After a long road leading me to a laparoscopic surgery in June, I was diagnosed with endometriosis and ovarian cysts. After my surgery, I felt okay for about three weeks before my same symptoms came right back. And now, they are worse than ever, affecting my daily life, spirit, and well-being (and other organs).

My friends and family have been as supportive as they know how to be, and after many conversations filled with tears and hugs and the saying “We just want you to get better, Shell,” we’ve all set up a fundraising page to help raise money toward my medical bills. It’s been completely overwhelming seeing how costly a chronic illness is, and how much isn’t covered by insurance.

Thank you to my loving friends who gave me the courage to accept the idea of a YouCaring fundraising page (same as a GoFund me page, but there is less interest) so I can hopefully be on the way to my next surgery making me feel better. This has been a long road since my endometriosis + GI diagnoses, and everyone who knows me (and myself!) are eager for me to get my life – and my body – BACK. You can click here to leave a note or donate if you wish; at this point, every little bit helps. Feel free to share this link:

https://www.youcaring.com/shelleycameron-963879

Thank you so much to everyone who’s kept loving on me, supporting me, and praying for me!

UnknownScreen Shot 2017-09-27 at 1.54.57 PM

xoxo

If you want to learn more about endometriosis, you can read one of my articles here or this emotional Instagram post with over 100 comments regarding this awful disease.

Back to school time is CRAY! As a toddler mama who works full time, my little guy goes to school pretty much year-round. But you can definitely sense the business all around town (and on the road and at school entrances) during those peak pick-up and drop-off hours. And that school hustle is REAL, isn’t it?!

Because of that, VitaCost has been a freaking LIFESAVER!!! Have you heard of them?! My friend Alisha just got me in the loop last month, and as a mom, I’m hooked 🙋🏼

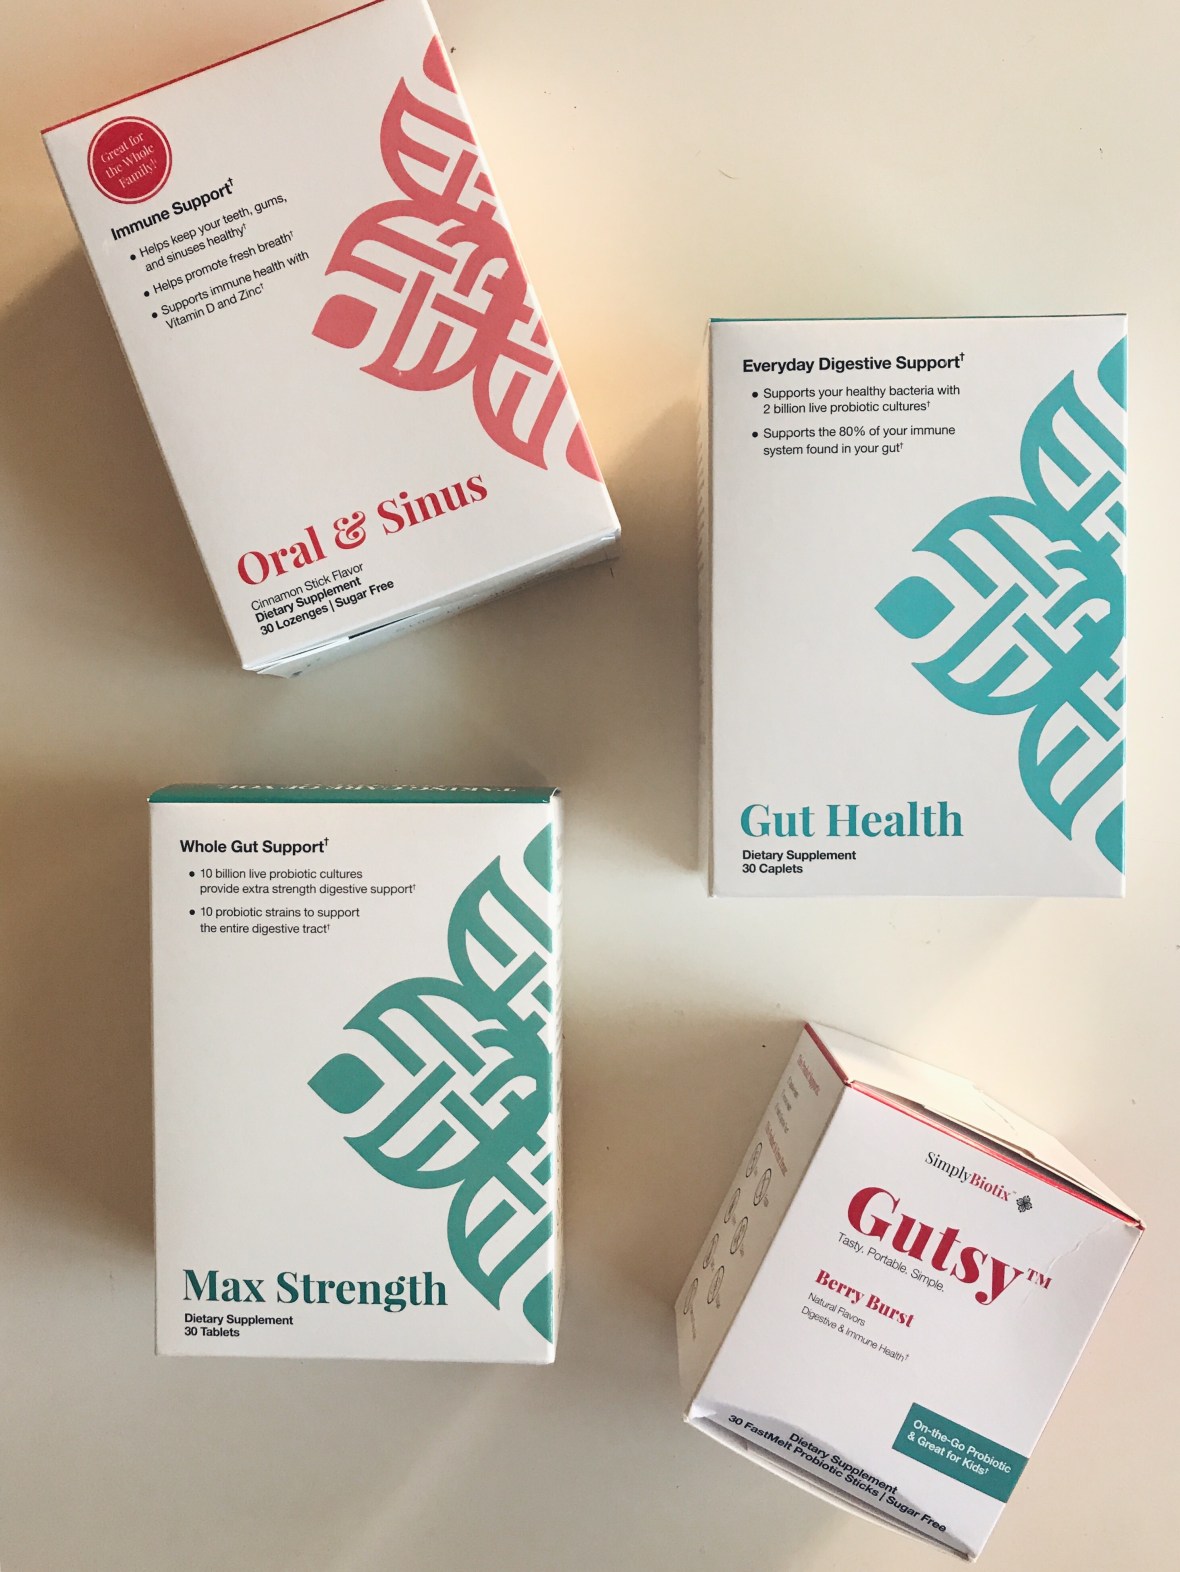
VitaCost helped me get Tanny back to school with tons of organic, non-GMO, and Gluten-free snacks and foods at a completely affordable price. Here were some of our favs:

I can also snag all my go-to ingredients for my favorite breakfast meals, like these gluten free and dairy free confetti snickerdoodle pancakes: How do you get your littles ready for back to school??

Be sure to check out VitaCost here!This post was sponsored, but all opinions are my own

What’s a weekend without baking in our house?! These gluten free snickerdoodle pancakes are simple, minimal ingredients, and yummy (especially for being a healthier option to pancakes!)

Ingredients:

  • 1 1/2 cups gluten free baking flour
  • 2 tablespoons ground chia seeds
  • 1 teaspoon vanilla extract
  • 1/2 teaspoon ground cinnamon
  • 4 tablespoons coconut oil
  • 1/4 cup coconut sugar or maple syrup
  • 1/2 teaspoon baking powder
  • 1/3 teaspoon baking soda
  • 3/4 cup coconut milk
  • Optional: top with yogurt, fruit, syrup, or sprinkles (because what isn’t better with sprinkles?!)

Directions:

  1. Add all dry ingredients to a bowl and mix
  2. Add wet ingredients and blend into batter
  3. Heat a medium-sized pan to medium
  4. Spray pan with coconut oil
  5. Spoon batter onto pan (I make three small “piles”)
  6. Flip after a few minutes, then continue flipping until lightly browned
  7. Enjoy!

All my blog and Instagram followers know that my weekends with Tanner = donut making weekends. We love to pick flavors together and bake on Saturday and/or Sunday mornings. He’s my little sous chef, and when they’re done, we deliver them to our neighbors to share.

This morning, we went for chocolate protein, whipping up these triple cashew chocolate cake donuts. We hope you love them as much as we did! For being baked and not fried and gluten-free, dairy-free and vegan, these gems are pretty delish.

IMG_7158.JPG

Donut Ingredients:

  • 2 cups gluten-free flour
  • 2 tablespoons avocado or coconut oil
  • 1 1/2 teaspoons baking soda
  • 1 1/2 teaspoons baking powder
  • 1 teaspoon vanilla extract
  • 1 teaspoon ground cinnamon
  • 1 1/2 teaspoons white vinegar or Bragg’s Apple Cider Vinegar
  • 3 tablespoons unsweetened cashew butter
  • 1/2 cup coconut sugar
  • 1 tablespoon coconut butter 
  • 1/2 cup water (add more if your batter is too thick; should be soft but not too runny)
  • 4 tablespoons Enjoy Life chocolate chips
  • Optional: 2 tablespoons ground flax and/or chia seeds
  • Optional: for sweeter donuts, add 3 tablespoons pure maple syrup

Frosting Ingredients:

  • 1 tablespoon unsweetened cashew butter
  • 1 teaspoon cacao powder (or more if you wish!) you can also melt Enjoy Life chocolate chips
  • 1 tablespoon coconut butter
  • 1 tablespoon almond butter
  • 1 tablespoon maple syrup or coconut sugar
  • 1 teaspoon vanilla extract 
  • 1/4 teaspoon ground cinnamon
  • 1 tablespoon coconut or avocado oil
  • Optional: 1 teaspoon water for thinner consistency

IMG_7160.JPG

Donut Directions:

  1. Preheat oven to 350 degrees F or use toaster oven, and no preheating needed
  2. Add all dry ingredients into a bowl and mix
  3. Add all wet ingredients into a bowl and mix
  4. Add all ingredients together and blend until batter-like consistency forms
  5. Spray donut pan with coconut or avocado oil
  6. Add batter to donut pan
  7. Bake at 350 for 20-25 minutes, or until soft and moist, but cooked all the way through (toothpick should come out clean)
  8. Cool donuts for about 20-30 minutes, then top with whipped frosting
  9. Optional: add sprinkles
  10. ENJOY! and share with some gems you love

xoxo,

Shelley + Tanny

It’s the weekend again, which means donut time at our house.

This week, I am super low on pantry goods and my fridge is less than stocked, so I’m actually shocked this turned out (and tasted good)! But they do, and they’re fun, so hope you enjoy!

Ingredients:

  • 2 cups gluten free flour
  • 1/4 cup organic coconut sugar
  • 1/2 teaspoon vanilla
  • 1/4 teaspoon baking soda
  • 1/4 teaspoon baking powder
  • 2 pinches of salt
  • 3 tablespoons coconut or avocado oil
  • 1 tablespoon multi-colored sprinkles
  • 1/2 teaspoon white vinegar or Bragg’s apple cider vinegar
  • 1/4 teaspoon ground cinnamon
  • 3 tablespoons softened coconut butter
  • 3 tablespoons orange or tangerine juice
  • 3 tablespoons lemonade or 1 tablespoon lemon juice
  • 1/8 cup water
  • 1/4 banana, mashed
  • Optional: powdered sugar for topping

Directions:

  1. Add all dry ingredients into a bowl
  2. Add all wet ingredients and whisk into another bowl. Add banana.
  3. Add everything together and mix until batter-like consistency is formed
  4. Pour into donut mold
  5. Bake at 350 for 25-30 mins
  6. Let cool and enjoy
  7. Optional: top lightly with powered sugar